Create a CI/CD Process With GitHub Actions
Run seamless workflows on your GitHub repository

At the centre of the GitOps tooling system lies GitHub Actions. GitHub Actions facilitate CI/CD processes using Git and GitHub. You can use Git Actions in DevOps processes to manage modern, cloud-native applications requiring fast and frequent updates.
While there are other popular tools like Jenkins, GitHub Actions allows you to automate workflows from the GitHub codebase. This article is a step-by-step guide on building, testing, and deploying merged pull requests to production with GitHub Actions.
What is GitHub Actions?
GitHub Actions facilitates workflows that trigger an action when an event occurs in your repository. The event can be a test, a pull request, or code pushed into the repository.
Workflows contain one or more jobs running in virtual containers. Jobs are steps defined in a script. When an event triggers the workflow, the job runs the desired script to execute an action.
The action can include building, testing, and deploying an application. Or testing code added to the repository.
Let's understand GitHub Actions better by creating one for an application. First, ensure you have the following tools:
Prerequisites:
Python3
Pip3
Pytest
Django
1. Create your Application
Create a simple calculator application. The calculator can add, subtract, divide, and multiply entries. And then create a new GitHub repository.
Alternatively, you can fork the application code from my repository and use GitHub Codespaces to set it up quickly.
You should have a Python calculator app with a calculator.py file and a tests folder with a test_calculator.py file.
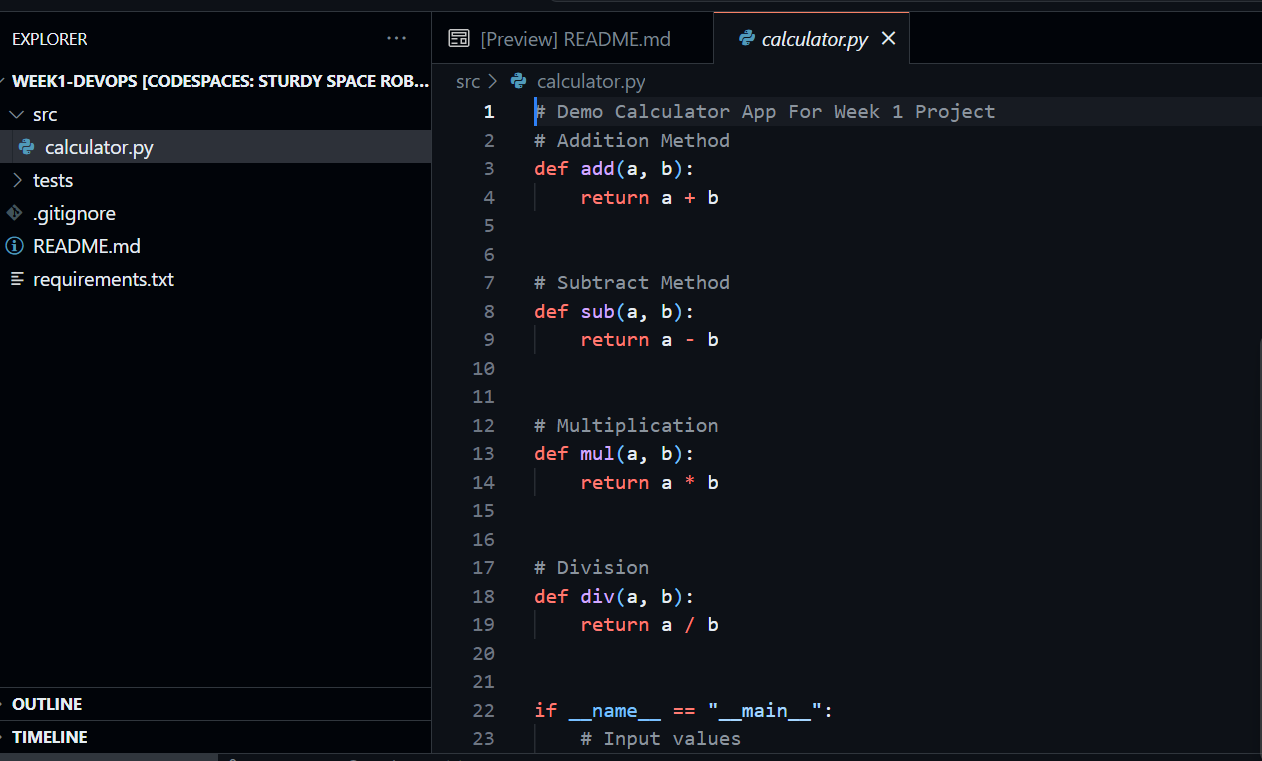
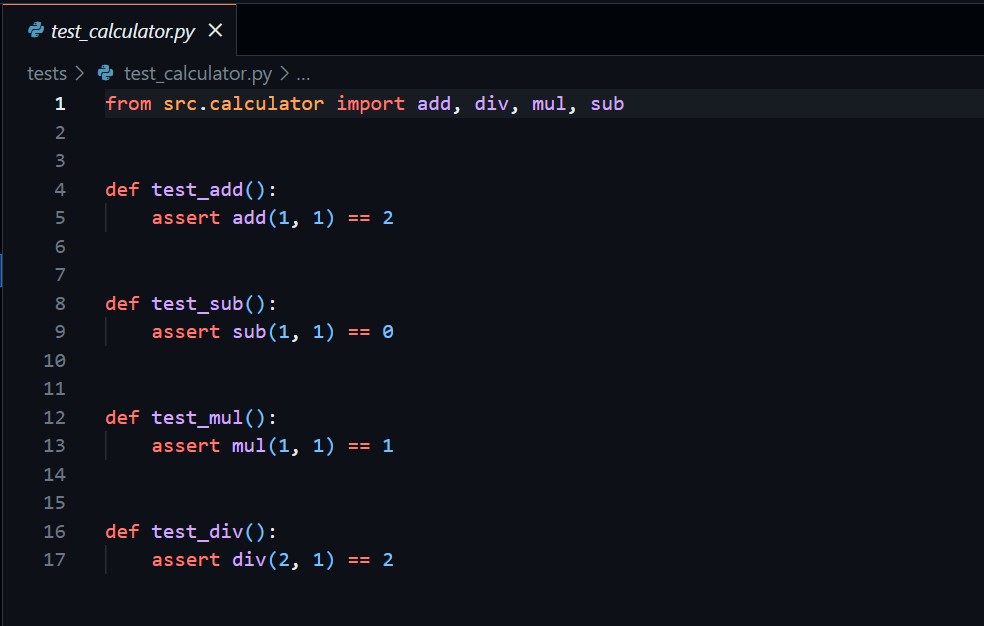
The calculator.py file contains the calculation logic for the app. The test_calculator.py file implements a comprehensive suite of unit tests. Add the following code to the empty test_calculator.py file.
from src. calculator import add, div, mul, sub

def test_add():

    assert add(1, 1) == 2

def test_sub():

    assert sub(1, 1) == 0

def test_mul():

    assert mul(1, 1) == 1

def test_div():

    assert div(2, 1) == 2
Your file should look like this:
Next, let's create the CI/CD process.
2. Create CI/CD process With GitHub Actions
When working in a team of developers, you need a strategy to maintain high standards of integrity for your code. You need to make sure that the repository has the correct code.
This is where GitHub Actions comes in.
In the following steps, you'll configure a CI/CD platform to automate testing processes to validate any change in the codebase.
The CI/CD process validates each change in the codebase before release. The process helps the team to catch bugs and ensure the calculator functions correctly under different scenarios.
3. Install Pytest
You need Pytest to run the test file. GitHub Codespaces has Pytest installed by default. But if you are working on your local machine, you must install it along with other dependencies in the requirements.txt file.
Install it under a virtual environment so it's only configured for this project.
To do that, create a virtual environment first:
python3 -m venv venv

source venv/bin/activate
Then, install the dependencies under the virtual environment:
pip install -r requirements.txt
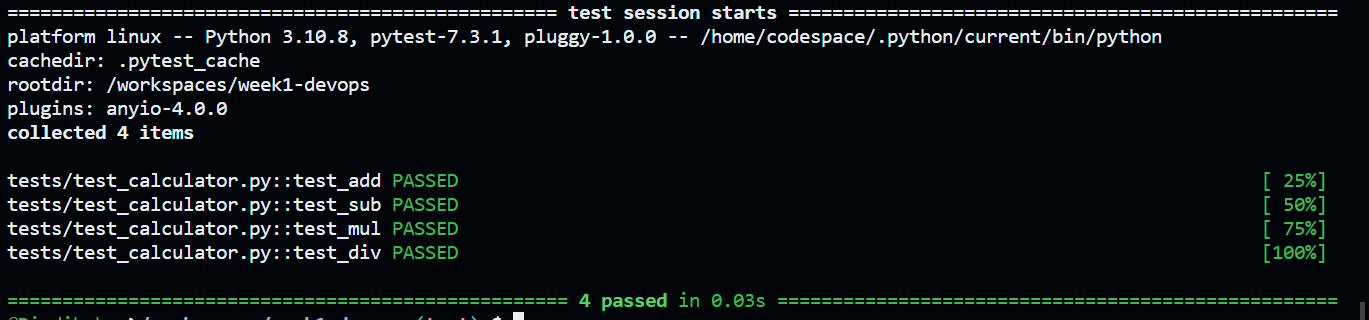
You should now have Pytest in your system. When you run the test using Pytest, they should all pass.
4. Create a workflow
To create a workflow, create a directory called .github/workflows in the root folder. Make sure it's the same directory that contains the .git folder.
Then, create a workflow YAML file called ci_cd_wf.yml in the new directory. Include the following text in the yml file:
name: test

on:
  push:
    branches:
      - main
  pull_request:
    branches:
      - "*"

jobs:
  test:
    runs-on: ubuntu-latest

    steps:
      - name: Check out repo code
        uses: actions/checkout@v3

      - name: Setup Python
        uses: actions/setup-python@v3
        with:
          python-version: "3.x"

      - name: Install Dependencies
        run: |
          python -m pip install -r requirements.txt
      - name: Run tests
        run: |
          python -m pytest -v tests
The above steps run on the main branch. When executed, GitHub Actions automatically runs jobs to build and run the app. Pytest also runs the test file to ensure calculations run correctly.
5. Create a test branch
Create a test branch to ensure all the tests are in one place. Create a branch called test and switch to it with the following code:
git switch -c test
Then, stage the branch and push it to GitHub. You can use git add .,git commit -m" ", git push origin test. If you are on codespaces, use git commit -am" " to commit.
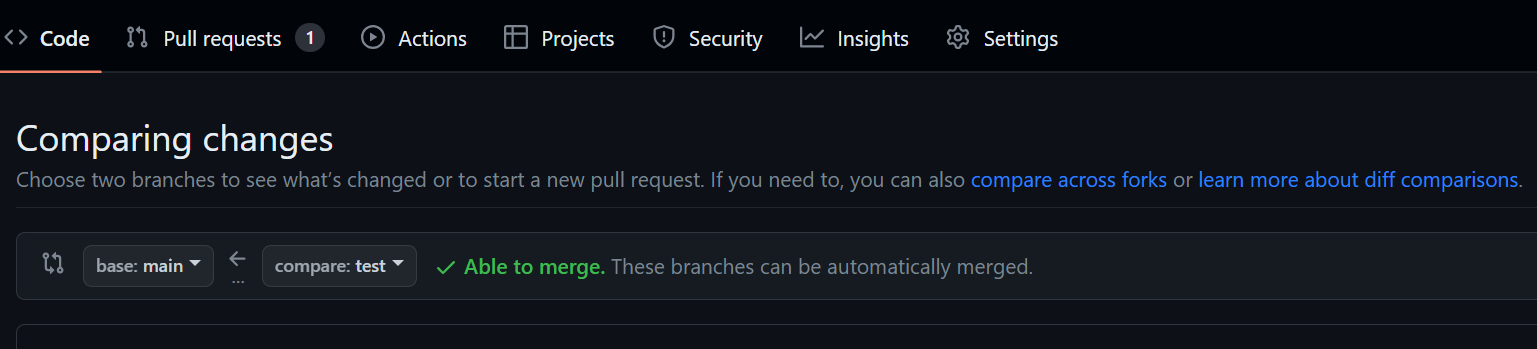
6. Create a pull request on GitHub
You should now have all your code on GitHub. Create a pull request on the test branch. Make sure to compare your main branch to the test branch and merge the two.
7. Check GitHub Actions
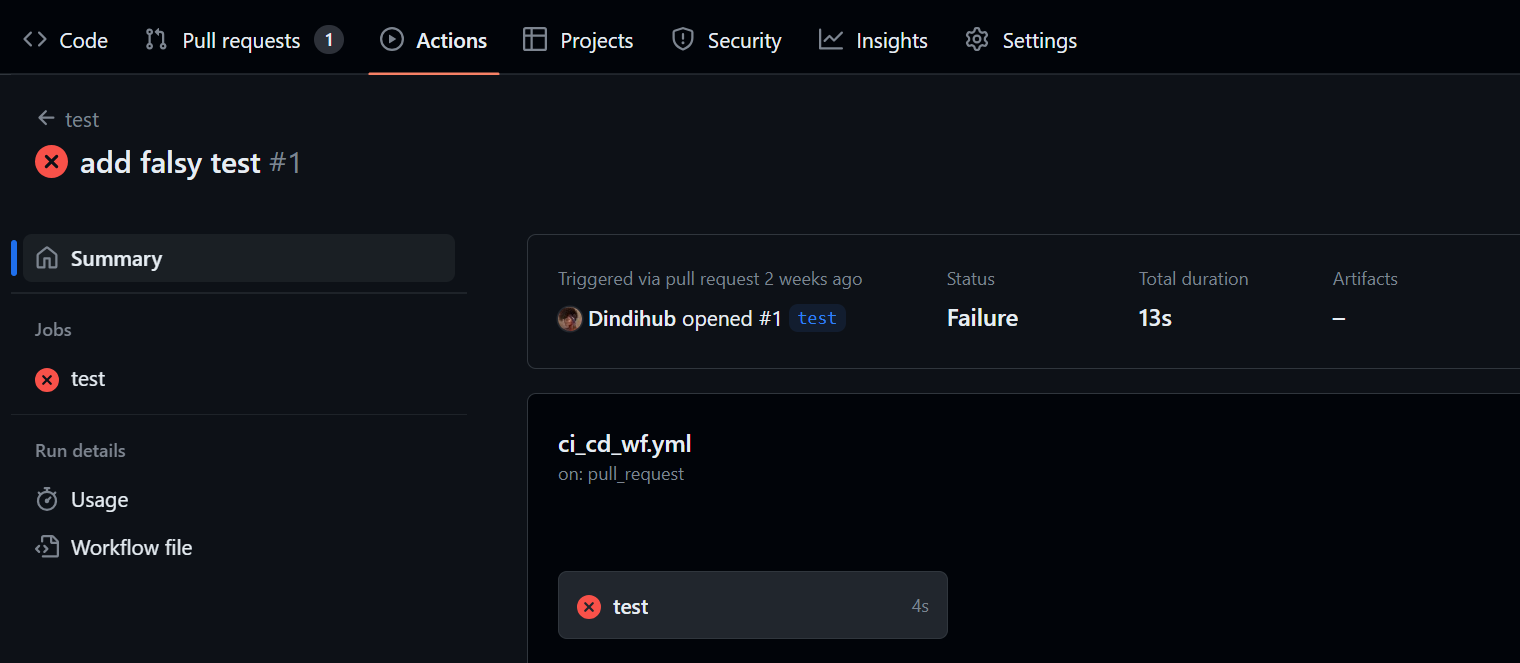
Now, if you click the Actions button on the navigation bar, you should see your workflows.
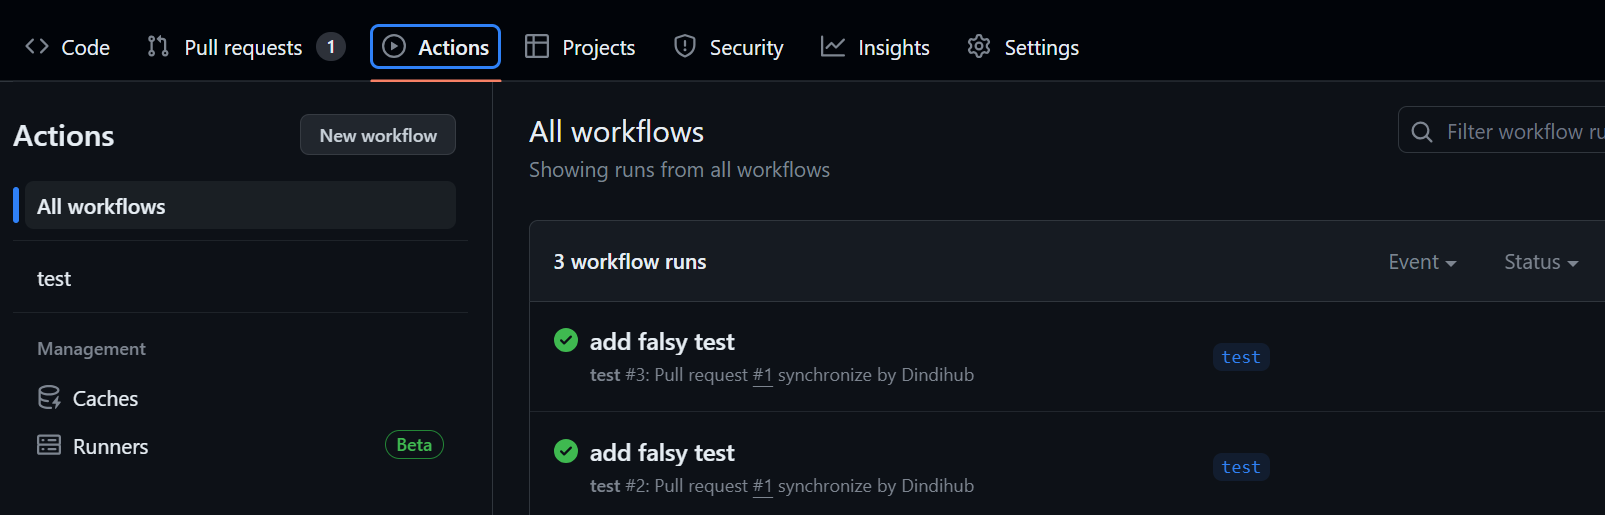
Add a false test in the test_calculator.py file to test if the workflow detects errors. Add, commit, and push the change to the test branch.
Your workflow works fine if you see an error message on the GitHub Actions tab. Congrats, you have created your first GitHub Actions workflow!
Correct the error by removing the false test on the file. You now have a functioning workflow.
Why use GitHub Actions
You can do so much more than just test with GitHub Actions. You can configure Actions to add files to your app, send messages, or deploy an application.
What makes it powerful is that it works seamlessly with Git, so you can control what goes into your codebase. This is great for team collaborations and CI/CD processes.